Search for:

SOAPSonar – Continuous Testing ideas

In this example, I am going to use a success criteria to monitor a specific field value for a given response, but there are many possible ways to implement continuous testing. To have a little fun, I am going to use a JSON weather services provided by http://api.openweathermap.org. Being the weather and this being Canada, there should be a lot of change.

Lets say you only interested in knowing if Rain is in the forecast for the next day. Lets set up a success criteria first that fails the test case should there be rain in the forecast. if you not done the introductory tutorial on Success Criteria please do so first.

1. File, New, Test Group. New JSON Test and Name it.  Paste the following in the URI

http://api.openweathermap.org/data/2.5/forecast/daily?q=Toronto&mode=jsonl&units=metric&cnt=1

and Set the method to GET. Commit and Send.

1 URI

2. Now All we want to know is if there is rain in the the forecast. Select Success Criteria tab, Add Criteria Rule and XPath Match.

2. Xpath

3. Now lets edit our XPath Match rule. By selecting it, we see the Graphical XPath, Scroll down till you see weather, main and select the value, right-click and Compare Element Value.

3 Element

4. Select tab Criteria Rules. Change the Force Action to Force Fail. and Match Function term to Rain. We now have a criteria rule that will fail the test case if rain is in the forecast. Drag it over to the Run View and Send. Did it fail? is there Rain in the forecast?

4. Rain

5. Now if we automate the test case and it fails, it should mean rain. So in Run View, select Create Command Line Script. (see pointer). you need to save the file first.

5 script

6. Now Lets Generate a Report, (One Page), call it rain and Email Report to the right address. We then need to define our email SMTP settings. On the second page, fill in the details for your email server and send test email.

6 automate

7. Lastly, let schedule as a a Task using the Windows Scheduler. Fill in details and OK.  If you want, you can go into windows scheduler to edit the task further. The test case uses standard windows scheduler.  On manually running it, I get a PDF report in my mailbox as an attachment.

7 Windows Scheduler

8. Note, I could also set up a Task in the response section to send me a email with some personalized note.

8 Task

This rather silly example is to show that you can automate a test case to run as frequently as you may want, to watch for a certain value in a certain  part of the response, that you defined as a success criteria. That could well be a response time, validation code or any other parameter, and need not be rain.

Questions, or Comments?

Conditional Test Cases

A recent customer request was to have a decision tree in an automation test. This is a more advanced tutorial, showing using global variables and decision trees.

Some reasons for wanting a decision tree could be as simple as saying, if a test fails, automatically run an additional set of tests, or more complexed, like saying, if a test returns a value in a given field, run an additional test or different test.

Lets use iTunes JSON service for this tutorial. Here I want to get a list of albums for a artist using the search feature.

1. Start SOAPSonar and lets create a new project. File, New Test Group, then File, New, JSON Test Case. Create 3 JSON tests cases (you can clone them). Name them Search, Lookup A, Lookup B.

1 Create test cases

2. Lets enter the queries. What I am going to do is a search first, then use the artist ID to get a list of Albums for that artist

  • Search A use http://itunes.apple.com/search?term=arctic+monkeys as the Query and GET as the method
  • Lookup A use http://itunes.apple.com/lookup?id=62820413&entity=album and GET as the method
  • Lookup B use http://itunes.apple.com/lookup?id=5893059&entity=album and GET as the method

2. URI

3. We need to define a global variable. Policy Settings (in project Tree), Project Globals, Project Global Variables and enter artist=1 (some initial value). We just defined a global variable called artist.

3. Global Variable

4. Now in Search, we define a Runtime variable for artistId. Look in the Response section, Runtime Variables, and scroll down till you see the artistId value. It should be 62820413. Right-click on the value and add variable reference. Leave the name as artisIsd and accept.

4 rt variable

5. Now we need to update our global variable with the runtime variable. Select the Tasks tab, then Actions, Update Global Variable.

5 Global

6. Now lets select the variable. Edit the Task created in 5, select artist and then right click and [RV]Runtime Variable and find and select artistId.

6 runtime

7. Its time to define our test case in Run View. Drag Search under Default group. Right-click on Search test and select Add Conditional Test Group.

7 Runview

8. Now we define the condition. Select Conditional Tests folder, then drag Lookup A and Lookup B under it.  Select Global Variable Match, enter artist (our global variable) and paste 62820413 for the value in Lookup A and  5893059 for the value in Look-up B. Commit and send.

8 Conditional

9. You should see that 2 Test cases were run. When we look at the results in report view, they search and Lookup A.

9 first scenario

10. Now lets change the search test from

http://itunes.apple.com/search?term=arctic+monkeys query

to http://itunes.apple.com/search?term=the+black+keys

Commit then switch to Run View and Run Suite. This time the second test was Look-up B.

10 alternate

Any questions or comments?

SOAPSonar – Testing SOAP, REST or JSON Services

” What is the difference Testing a SOAP Services vs. JSON/REST or other service using SOAPSonar” After trying to answer this question verbally 3 times in the last week, I thought it a good idea to show it in a post.

  • SOAP – “Simple Object Access Protocol” usually uses XML, and has WSDL. It also has an explicit error format or SOAP Fault messages. It tends to be heavier weight and services are often far larger.
  • REST – Representational state transfer is a software architectural style consisting of a coordinated set of architectural constraints applied to components, connectors, and data elements, within a distributed hypermedia system of which JSON is one language.
  • JSON – JavaScript Object Notation, uses readable text (not tue XML)to transmit data objects, consisting of attribute–value pairs. JSON does not use WSDL (Similar WADL is unpopular, in draft and seldom used), but usually uses a service description document. JSON Schema is also seldom currently used. JSON has no explicit error format. This makes JSON light weight and ideal for mobile applications.

So what does that really mean for someone using SOAPSonar?

The Difference

With a SOAP Service

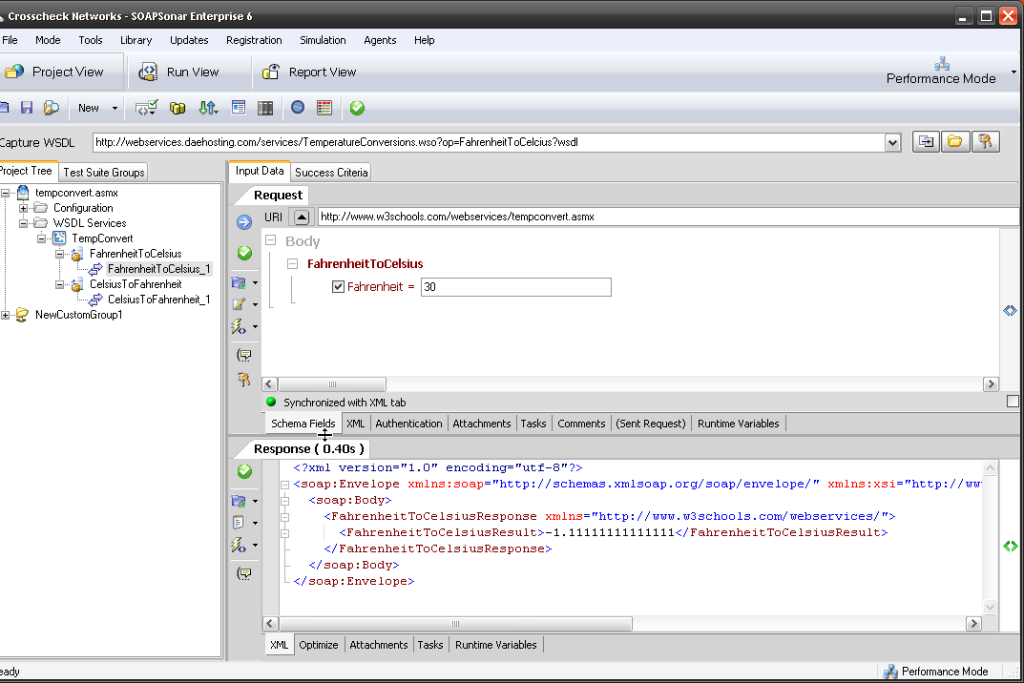
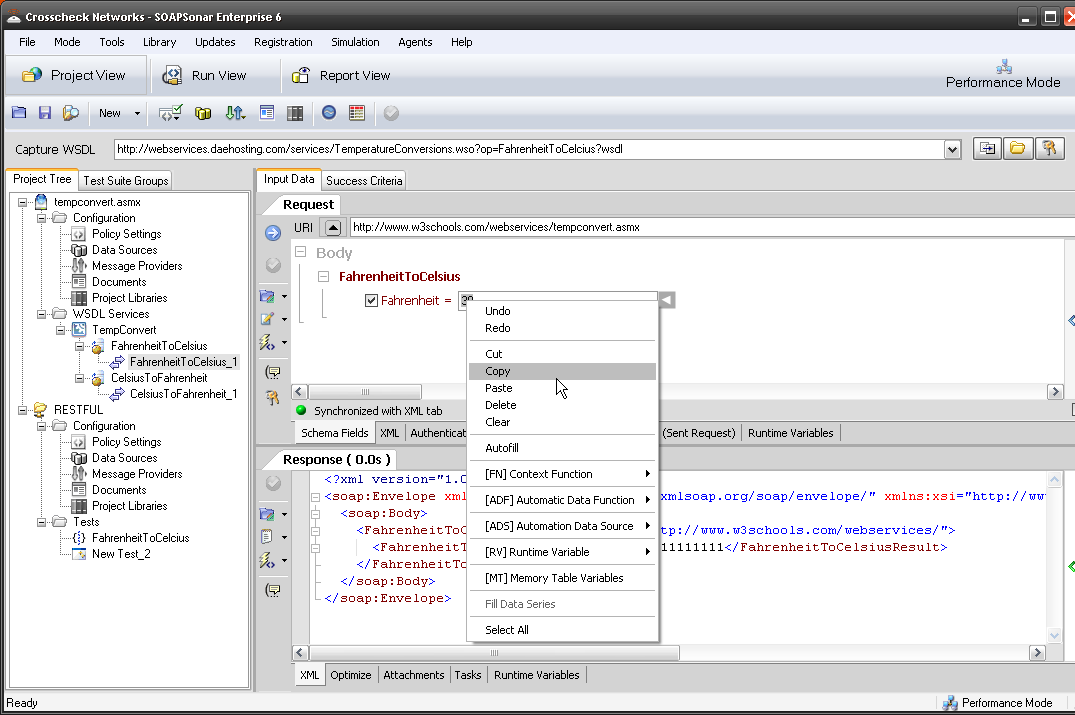
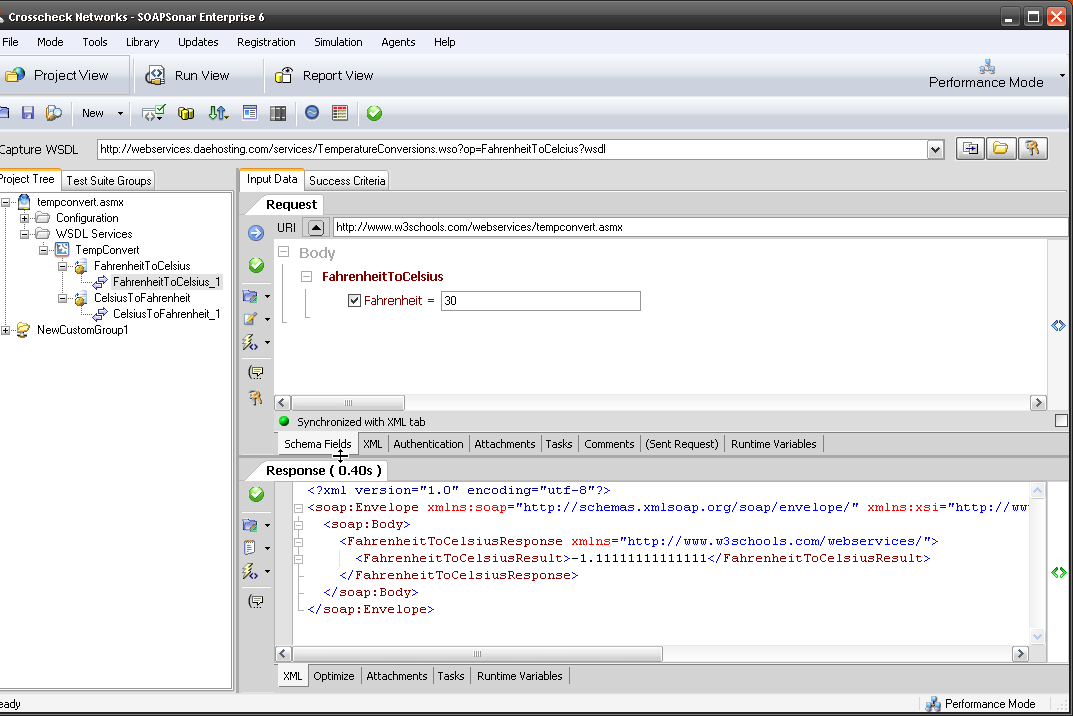
You can use the capture WSDL bar and enter the URI, with ?wsdl afterwards and discover all the available services. Try it now with

http://www.w3schools.com/webservices/tempconvert.asmx?wsdl.

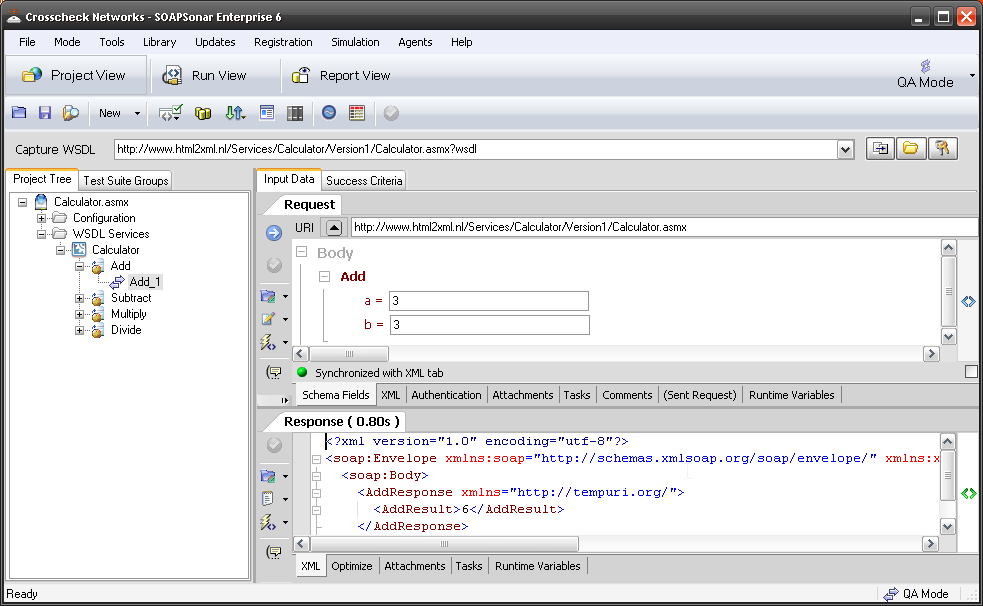
Notice the TempConvert and two services are automatically populated. When you select FahrenheitToCelsius_1, notice the Body is populated with field in SOAPSonar. If you enter a value, commit and send, you get your XML response.

1. WSDL
SOAPSonar offers a way to view the XML request, using the tab labelled XML and request headers. The same is possible in JSON, also headers tend to be lighter weight

2. XML

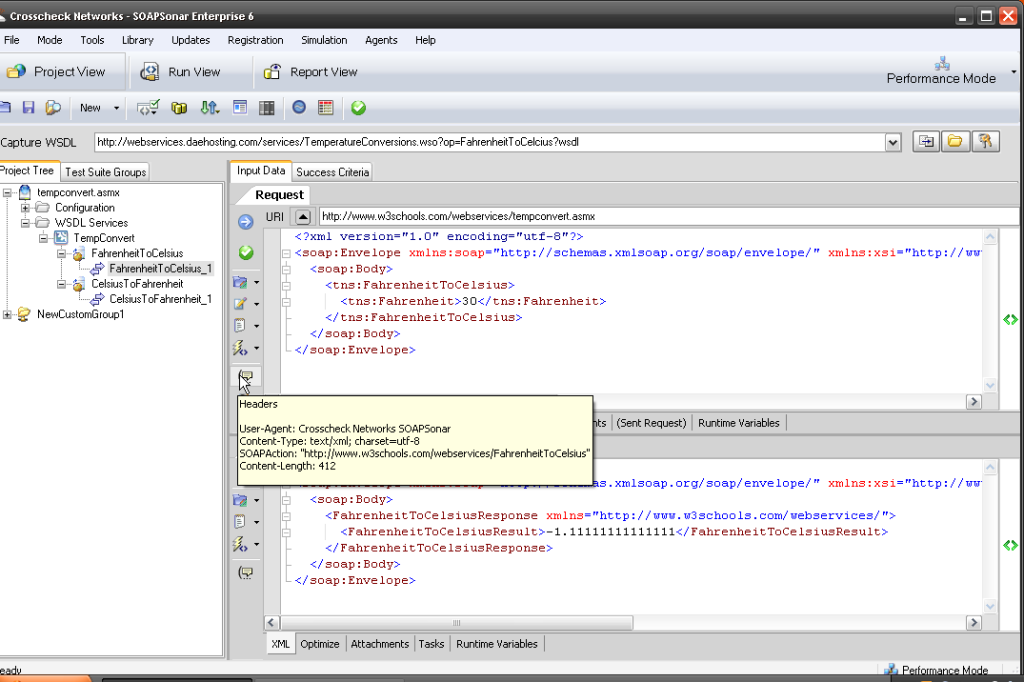
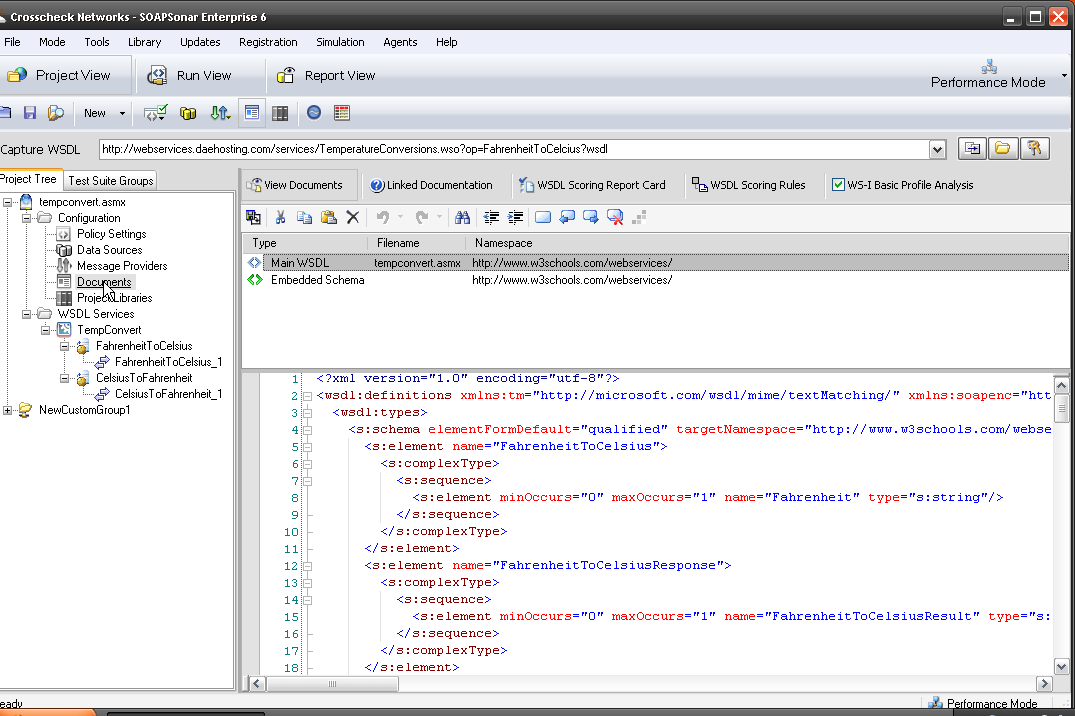
You can Also go to Documents and View Schema, which most likey does not exist in JSON

3. View Schema

With A JSON Service

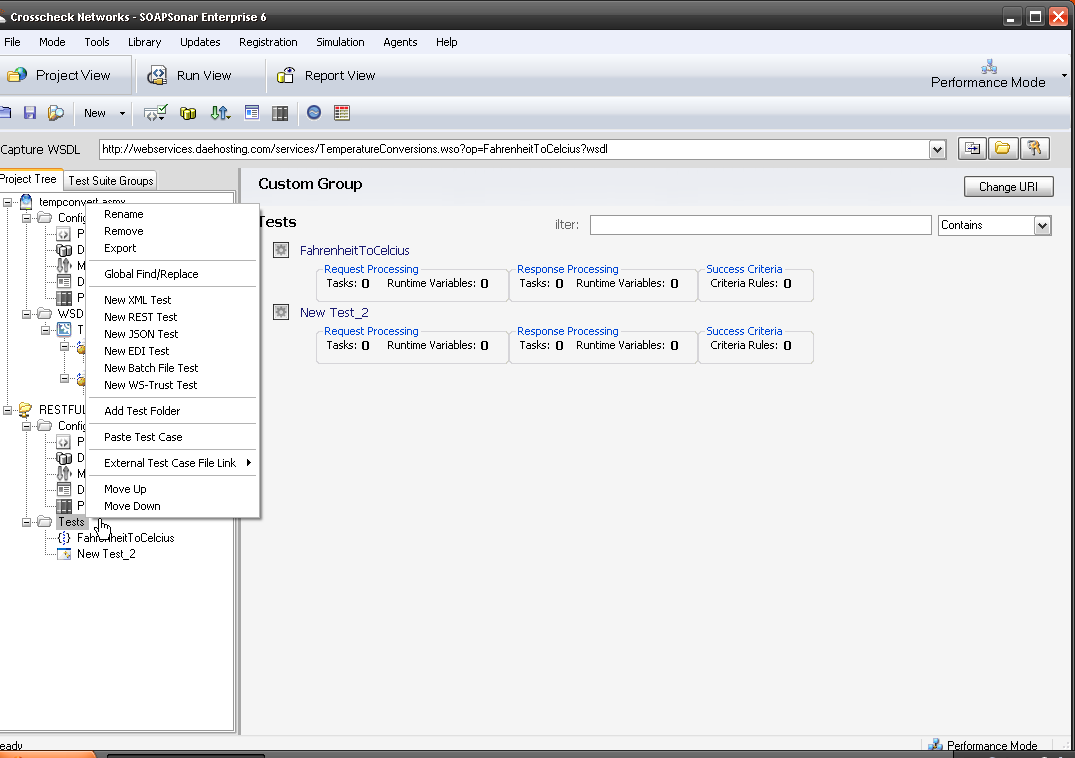
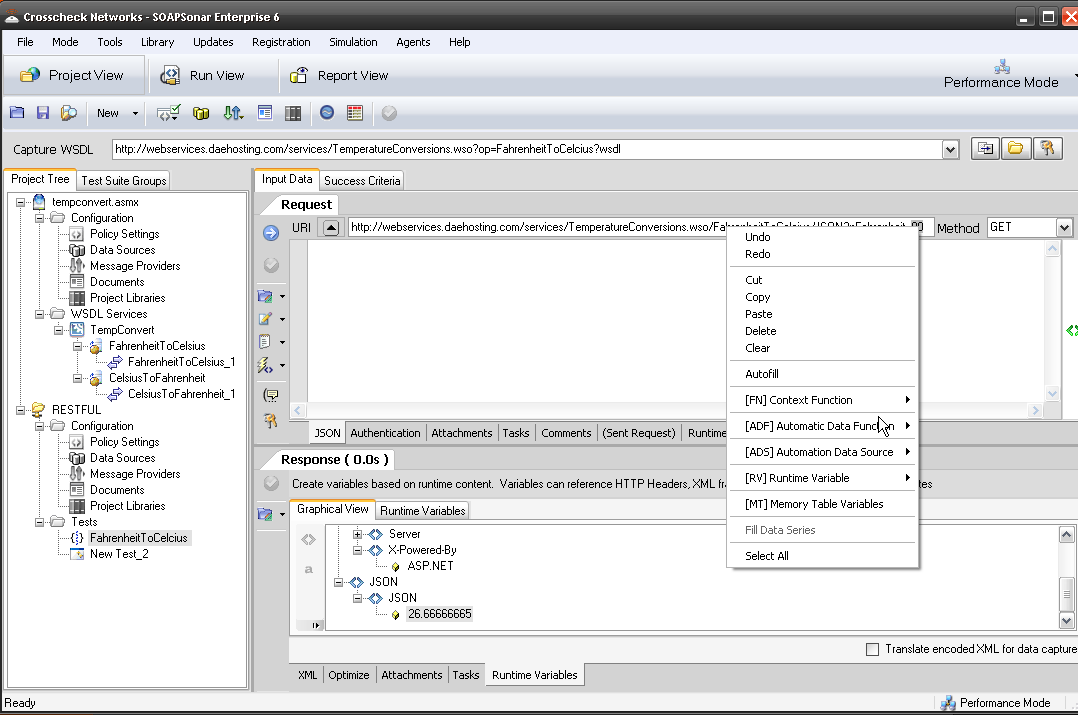
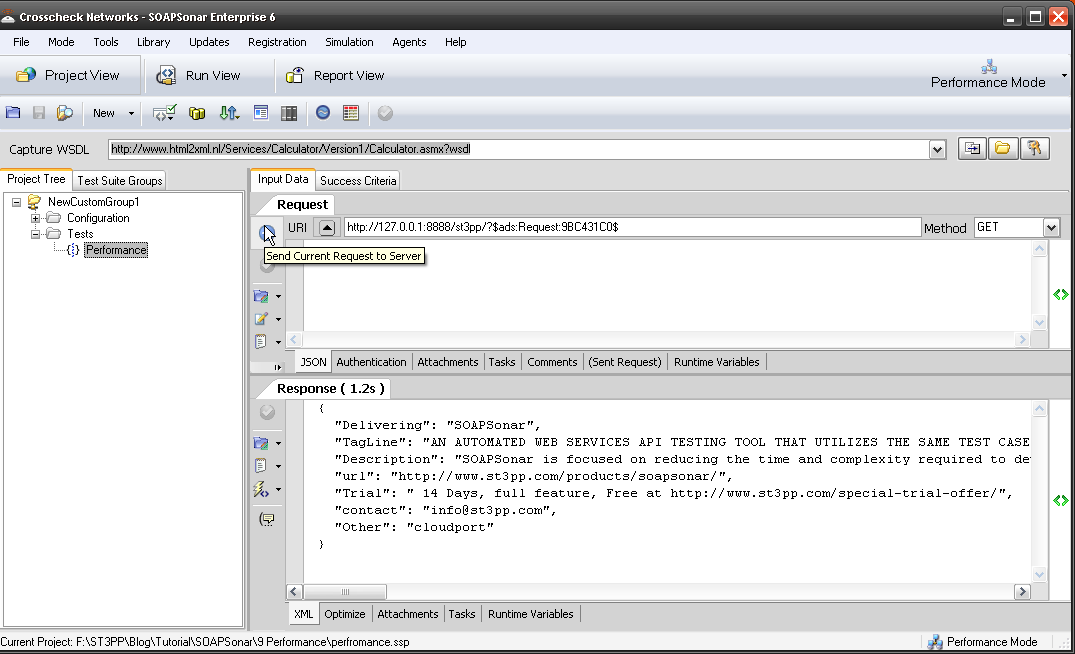
There is no WSDL that can be captured and the chances are there is no schema. This means it is not possible for a Tester to automatically discover services in the same way. In SOAPSonar, we start by selecting File, New Test Group and then we have to name the test group. We can then Add a new test, by right-click, New JSON Test or more generic New REST Test and then naming each one.

5 New JSON

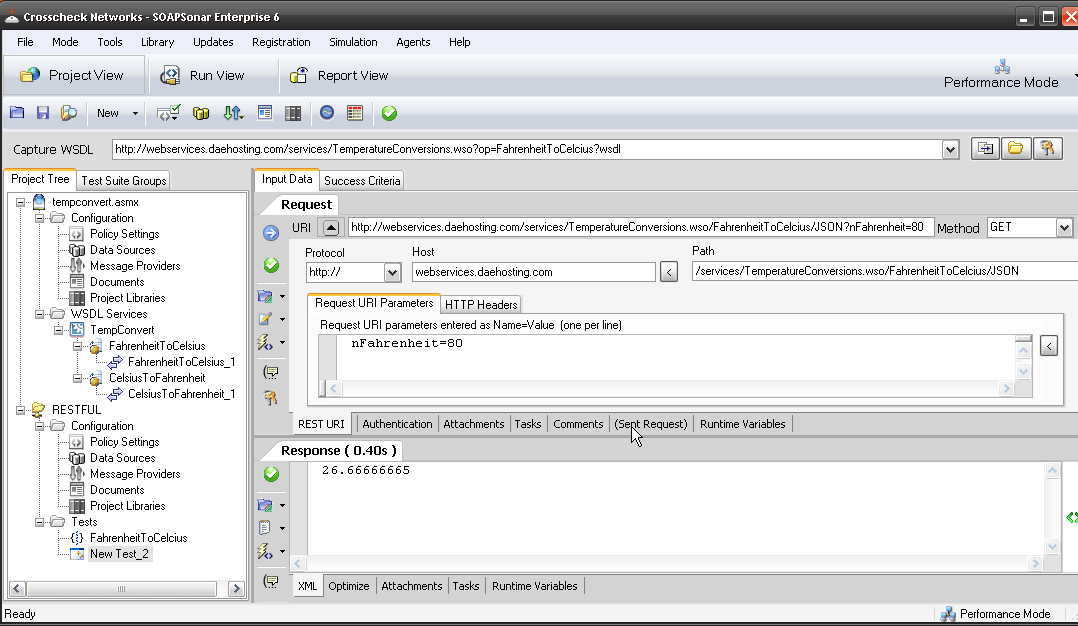
We then need a URI, the query parameters and the Method. Lets use

http://webservices.daehosting.com/services/TemperatureConversions.wso/FahrenheitToCelcius/JSON

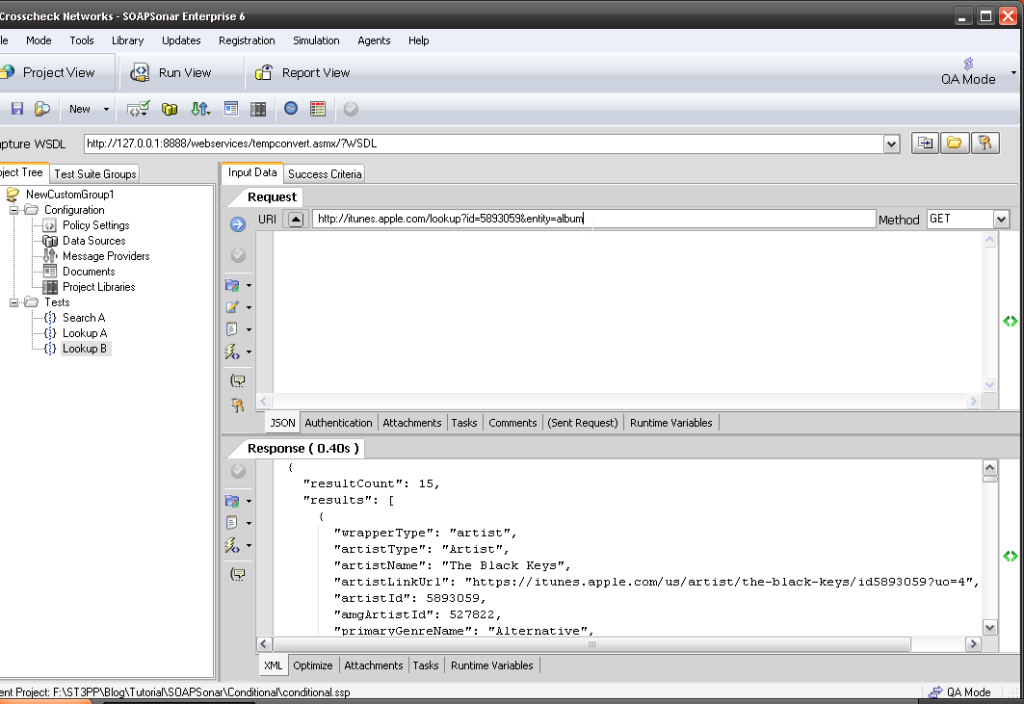
as the URI and ?nFahrenheit=decimal as parameter to send and GET as the method. Then for 80 as the value, we replace Decimal with 80. How do I know this?, I read the document definition and example. The REST view in SOAPSonar would be as below. Notice the body of the request is frequently empty

6 REST View

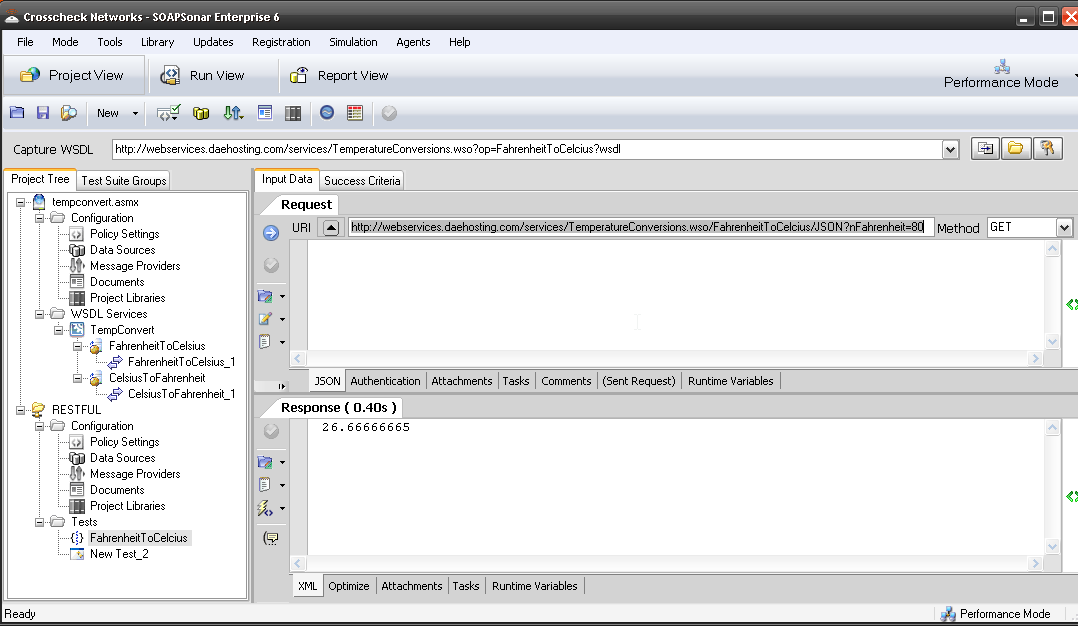
The JSON view, is a single query line in the URI, and the Method. There is no WSDL to View and although incorrect queries will error, the description is limited.

7 JSON

So how then do Testers know what to Test? Its usually one of 4 ways
  1. The tester reviews the JSON code and looks for all URI, Methods and attribute–value pairs and reverse engineers tests cases. This takes significant JSON knowledge
  2. The Tester relies on the service description document, which should define all attribute–value pairs, Methods, URI’s and Query Strings. This requires good documentation.
  3. The developer and / or tester (Agile facilitates this) create and define the unit tests together. This unit test is then used to validate the basic functionality of the each function by both developer and tester. The tester, then adds ADS, chains functions, tests negative scenarios, load, and all additional aspects of the function to get the desired coverage
  4. You embrace yet to be standards of JSON Schema (tough given its level of maturity)

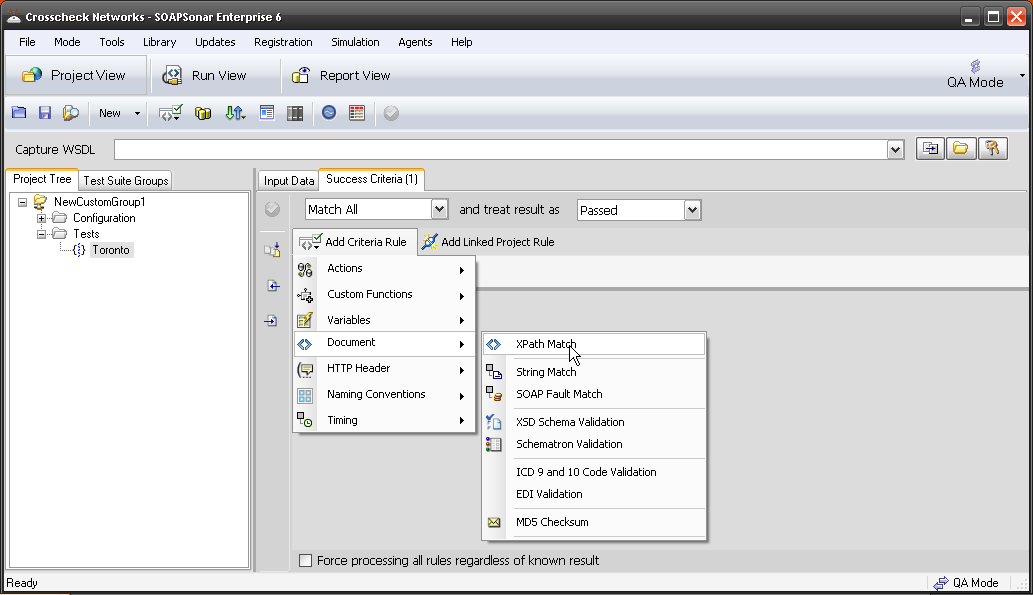
With JSON services, defining success criteria is also extremely valuable, due to the lack explicit error format. Its also far easier far developer to make minor changes to code, as they dont need to update schema, making regression testing important.

The Same

So now that we covered the differences, the rest is much of the same. Lighter weight JSON services tend to be much smaller and services and the very easy structure to understand. Be it SOAP or REST, SOAPSonar (and CloudPort) will identify all the variables and display them in the same manner.

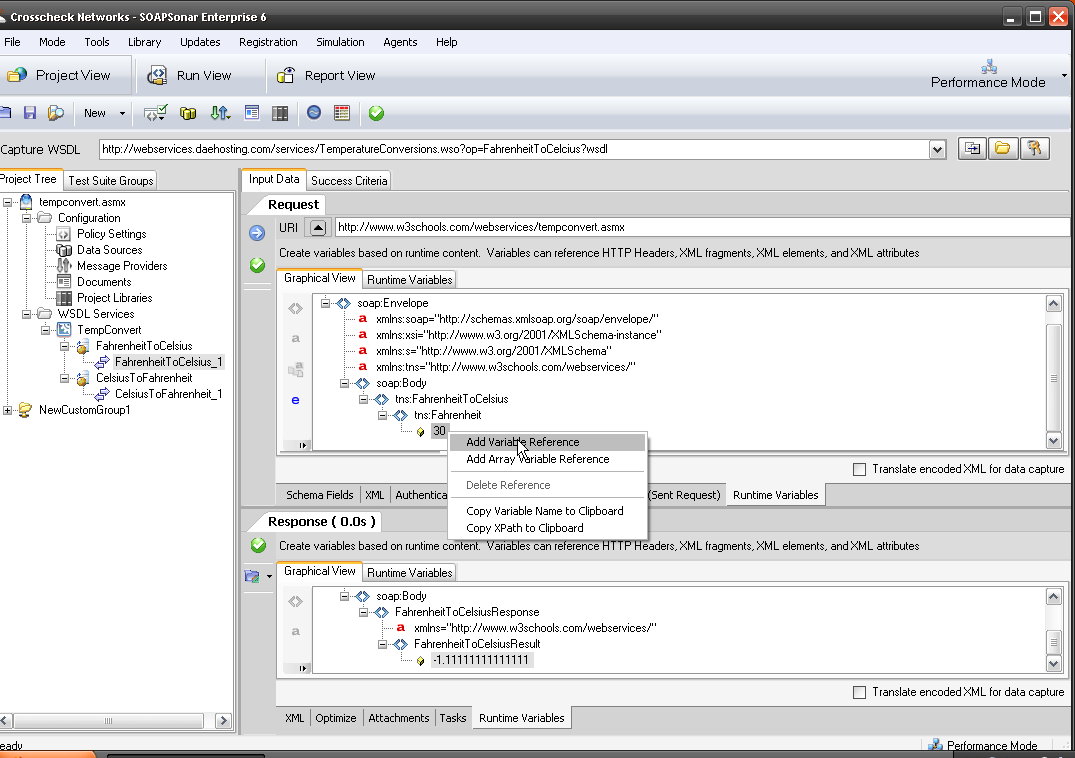
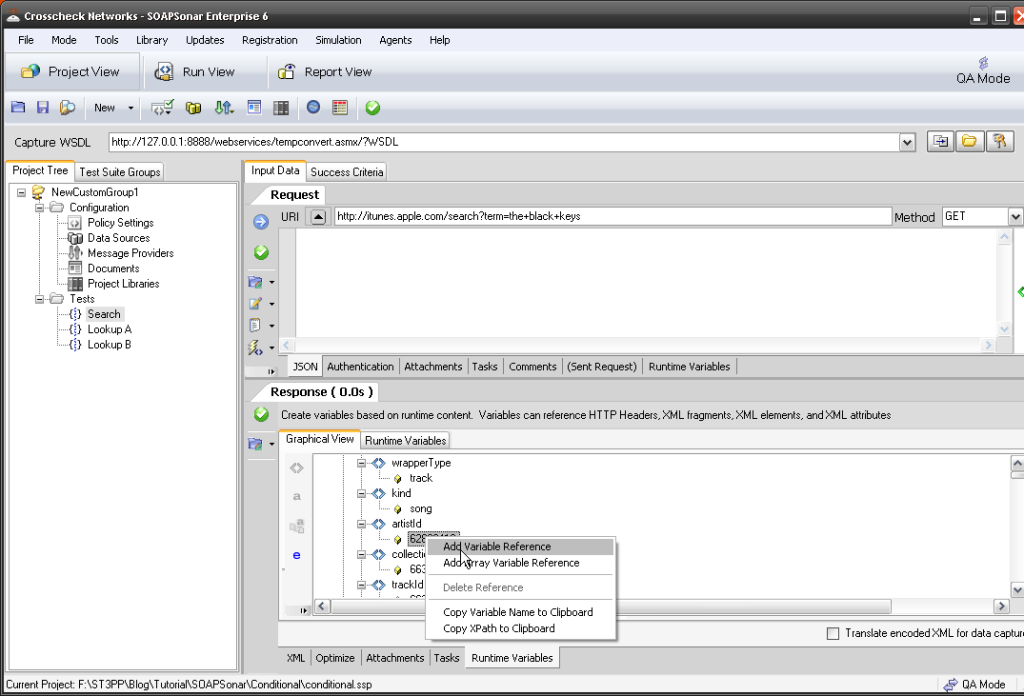
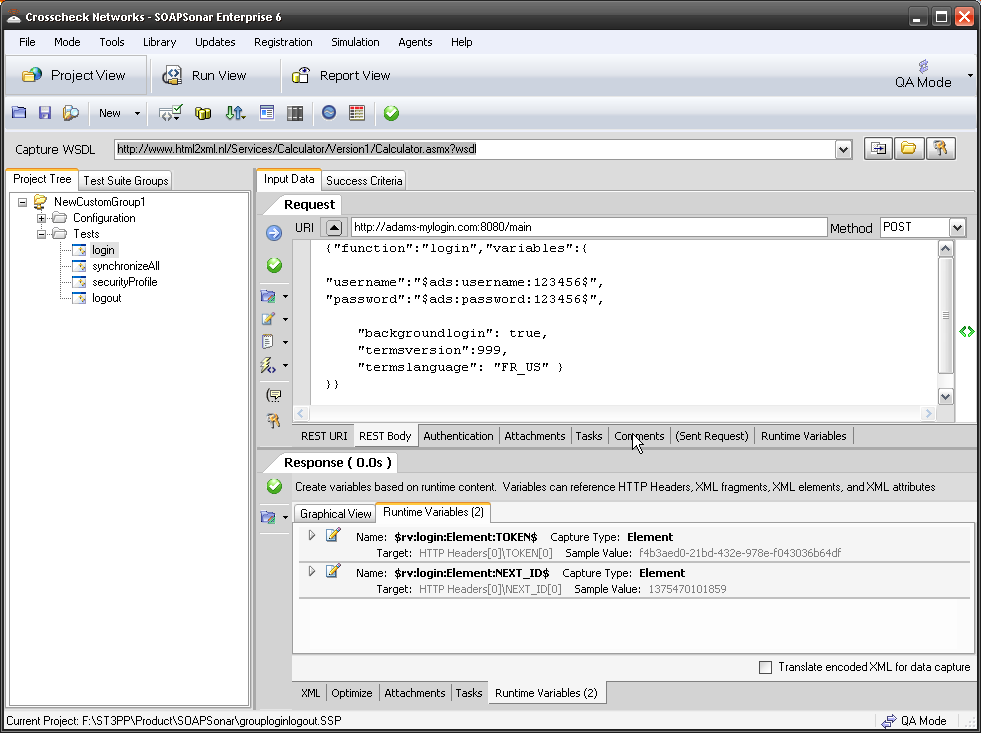
Here is what that SOAP service looks like in graphical view for both request and response in the Runtime Variables tab. Any of these variables can now be used for chaining, automation data sources, success criteria, regression and a variety of testing options, using the right-click option.

4 Variable reference

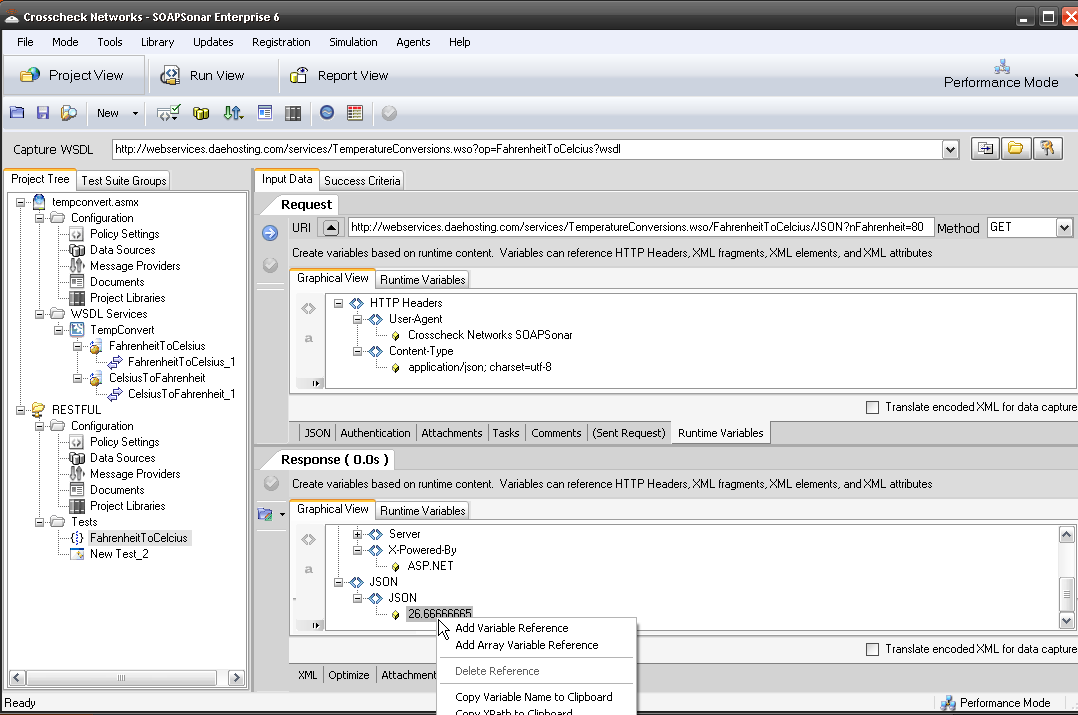
Here is what the JSON service looks like for the graphical view for both request and response in the Runtime Variables tab. Any of these variables can also be used in the same way as SOAP, for chaining, automation data sources, success criteria, regression and a variety of testing options, using the right-click option.

8. JSON Vairables

If you wish to use a variable with SOAP, you right-click and add it in the field.

9 Query

If you wish to use a variable with JSON, you right-click and add it in the URI (or body occasionally) in the same way.

10 JSON Query

Conclusion

Yes there are differences testing SOAP vs. REST when using SOAPSonar. The lightweight nature of JSON, that makes it attractive, requires closer ties to development and more rigorous documentation in order to ensure that the service is being “discovered” and tested. This means Testing and Development need a clearly defined process, de-mark, deliverables and co-operation between developers and testers.

I hope this helps those QA professionals as that are now testing JSON vs SOAP services to adapt to the changes quicker. Questions, Comments?

10. SOAPSonar – Distributing Load Testing Geographically

Physically distributing the location of load test clients has 2 benefits. Firstly, it overcomes the limitations of network segment and  works station resources. Secondly it allows for the testing and understanding of the impact of network and location on load and performance.

Yes, you could run around, call different people and press the button at the same time, but integrating the test results can then be very difficult. Triggering a load test from a single central instance, across multiple physical machines, and centralizing the report generates a single drill down report.

In my previous tutorial we load tested using 3 virtual machines, using only one physical machine – SOAPSonar. This tutorial carries on were that one ended, so please do tutorial 9 first if you have not. This tutorial will now distribute the same test across multiple physical machines or “agents”

1. Check to make sure you still running the CloudPort Runtime and Performance Test Tutorial is loaded. this will be the service we will load test against. Confirm the IP address and URI.1 runtime

2. Launch SOAPSonar and go back into Project view and just run a quick Send request to server to make sure it is all working still. This confirm your [ADS] is in place and your runtime is up and URI is right.

2 SOAPSonar

3. Now we need to download our Physical Agent client software. Select Agents in the Top menu (next to help) then Download SOASPSonar Agent Installer. Your browser should launch and you should be able to download the latest agent by selecting it. Its important to keep your SOAPSonar Release and the Agent on the same release. Install the agent on your own machine or another if you would prefer.

5. Agent port

4. Run the agent software after installation and select File, Preferences.

4 agent preferences

5. Confirm your port and Select Log Individual Agent Run Events. You should now see CloudPort and Agent in your task bar.

3 Download

5.1 taskbar

6. Now we need to tell SOAPSonar that we have a agent available.  In SOAPSonar select Configure, Agents.

6 Agents

7. Select the Icon for add a New Agent, Give it a name that so you remember were it is. (like Montreal, Vancouver, Halifax, London or in my case James Bond). Then the IP address of the Agent (in my case its local so 127.0.0.1) and confirm the same port we checked in 5 above. Select OK. We now have a Agent to use along with our local instance in load tests. The idea is not to have it on the same machine for load tests, and preferably on a different network segment, but this is just a tutorial on how.

7 james

8. Now switch to Run View, and we should still have the same DefaultGroup and Group Performance Settings from the previous tutorial. Select Performance Loading Agents. Select Import Default Agent Definitions icon and your agent should be shown. Activate it by selecting the Red dot to Green. Commit settings to save your agent. 

8 activate

9. Now all we have to do is allocate how many virtual users to each agent. You have both your local SOAPSonar instance or Local Agent and then the new one we created. Select Group Performance Settings and change the Virtual Clients to 4. Then right next to that, select the icon for Agent Thread Allocation.

9 Add Virtual

10. Lets give 2 Virtual Agents to each of or physical agents. Confirm duration is 3 seconds and Commit and Run Suite.

10 alocate

11. You should now see the Agent Initialization Screen. Once the agent is initialized, select Start Test. If your agent does not initialize, check the IP address and Port and ensure you can ping the agent.

11 Agent initialize

12 In the Real-Time Monitor, you see you can now view performance by physical agent.

12 Real time

13. In Report View, you can now show performance for one Physical Agent, One Virtual Agent or aggregated. This allows to to compare performance from one physical location to another.

13 Repaort

Conclusion

Distributed agents is part of the Server Edition of SOAPSonar, along with expanded number of virtual users. Physical Load agents allows performance testing to scale through distributing the agents and resources. It also allows for testing of network infrastructure as well and application performance. Using the same Test Suite again as we use for functional testing, regression and performance to save time and be easily automated.

This is the end of the introductory series of Tutorials. If you doing a trial and just looking for a high level understanding how SOAPSonar can help you, you should be on your way. From time to time I will post new tutorials on new features, different options and greater challenges. Other features not as of yet used.

In the mean time, let us know how you enjoyed these. Private comment in the form below and public by starting a discussion at the bottom of the page.

Warning: strpos() expects parameter 1 to be string, array given in /home/content/13/11164213/html/ST3PP/wp-includes/shortcodes.php on line 193
[contact-form to=’[email protected]’ subject=’I just completed SOAPSonar Tutorial 10′][contact-field label=’Name what you want to be called.’ type=’name’ required=’1’/][contact-field label=’Email if you want a response.’ type=’email’/][contact-field label=’Comment. ‘ type=’textarea’/][/contact-form]

Comment or suggestions always welcome.


8. SOAPSonar – Identity and Authorization

Many of our customers start their development or testing using some other product, then reach a point where they need to use some form of identification, cookie, key, encryption or other form of authorization and realize the tool they using does not support what they need. They then look at the months work completed vs starting with a new tool.

There are simply so many ways, standards and architectures for identity, that most tools are unable to support more than a few. Before selecting an automation tool, I highly recommend taking the time to identify and test all the applicable identity and authorization needs you may have. Although this is a “tutorial” I am not going to cover off all possible options, or full detail on a single option. Rather, I will try and explain some of the more common options and were to find these settings.

In this first example I want to show the testing of a login service. In this (REST) example a POST request is made to a given URI and the message body contains the username and password variables. Once successfully logged in, the service responds with a Token and ID, that are used further in the application. These username and password variables can be tested via an automation data source (.csv) and each step of the login process chained, by creating a runtime variable of the token response. The benefit is then the ability to load test this login service using this [ADS].

1 Message body
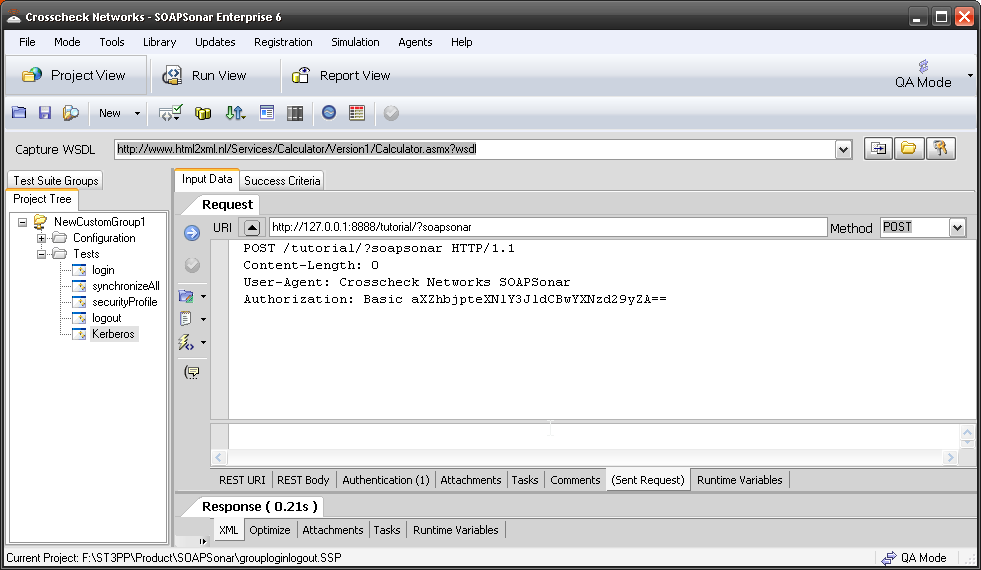
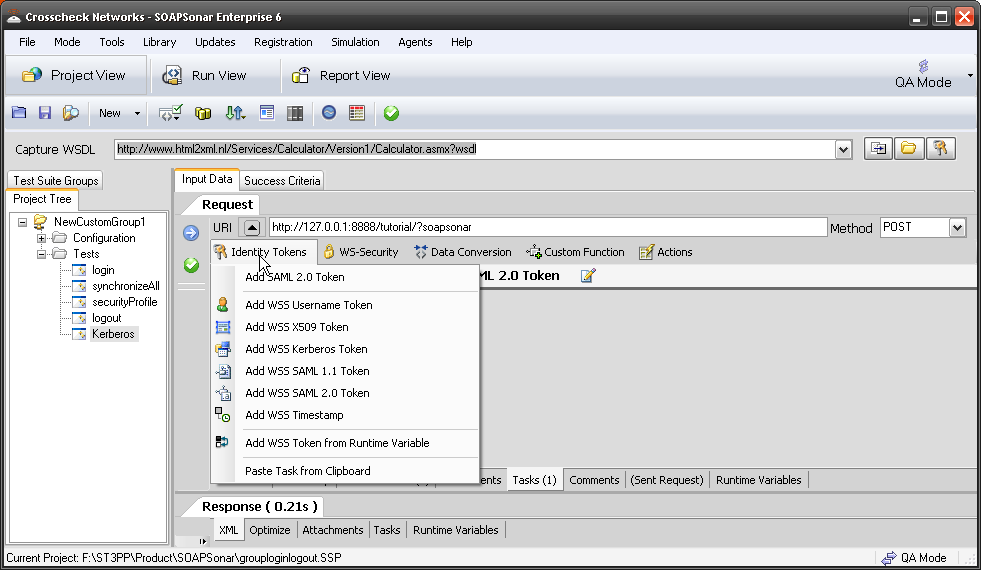
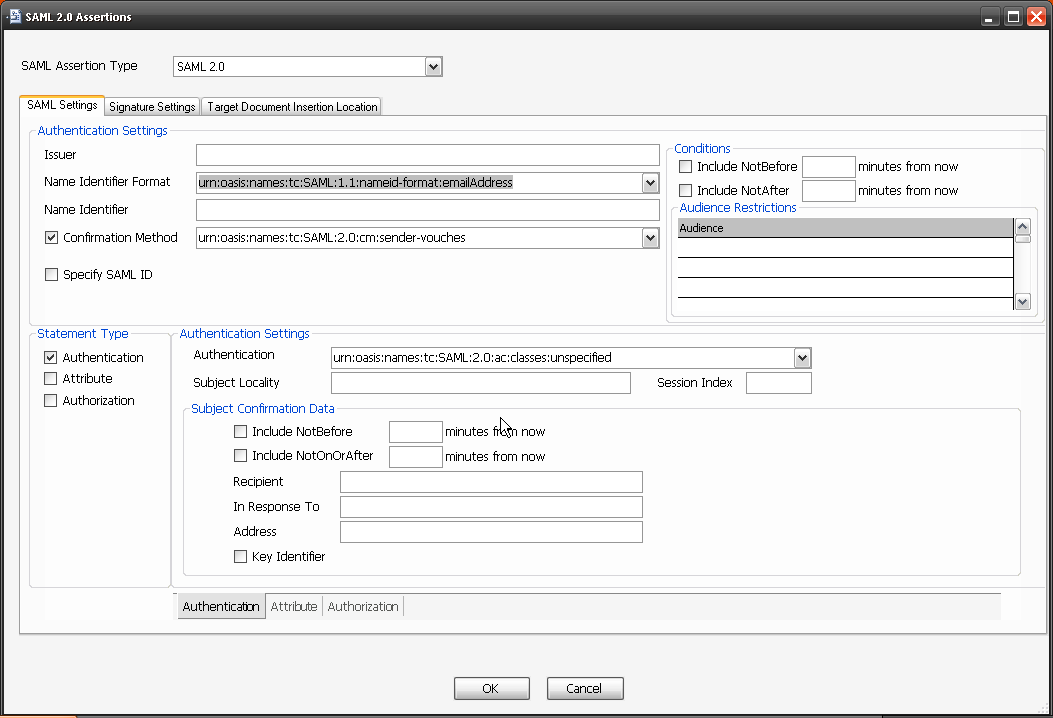
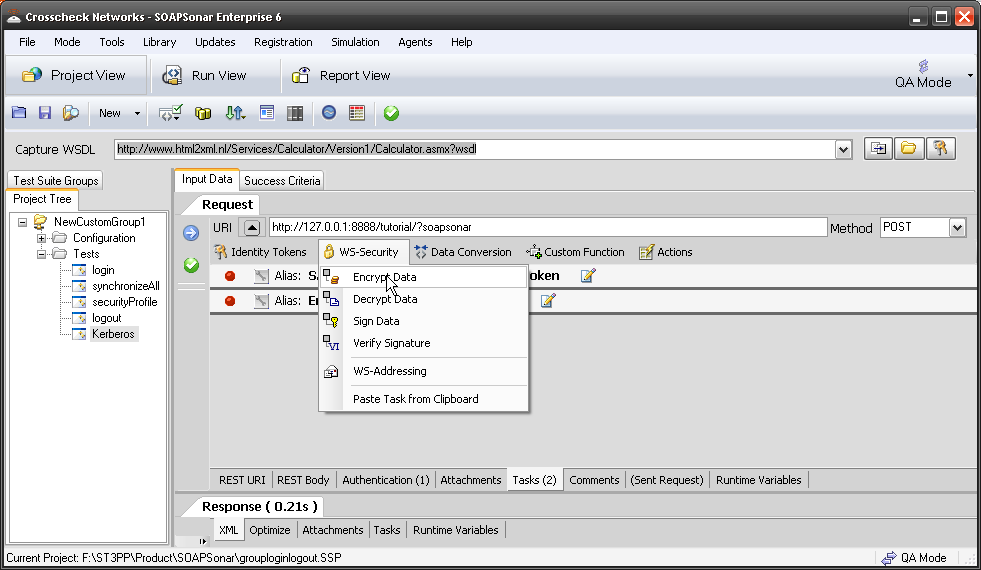
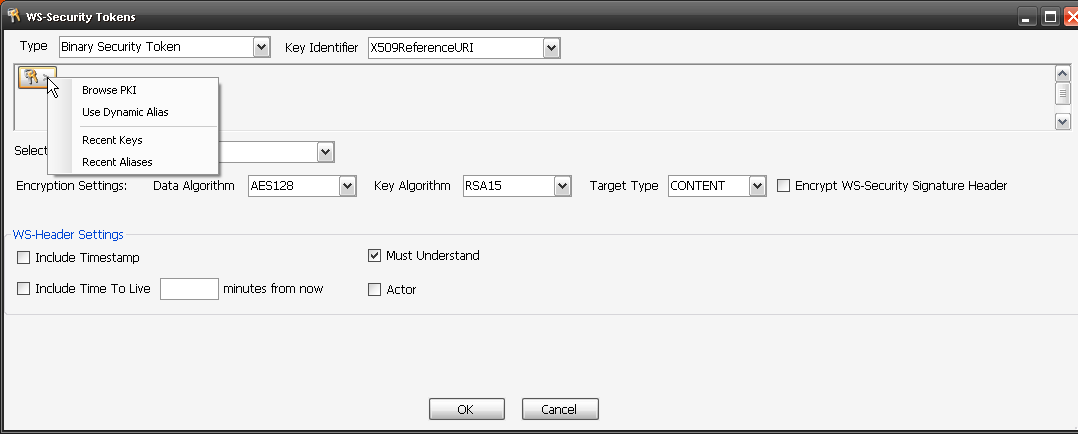
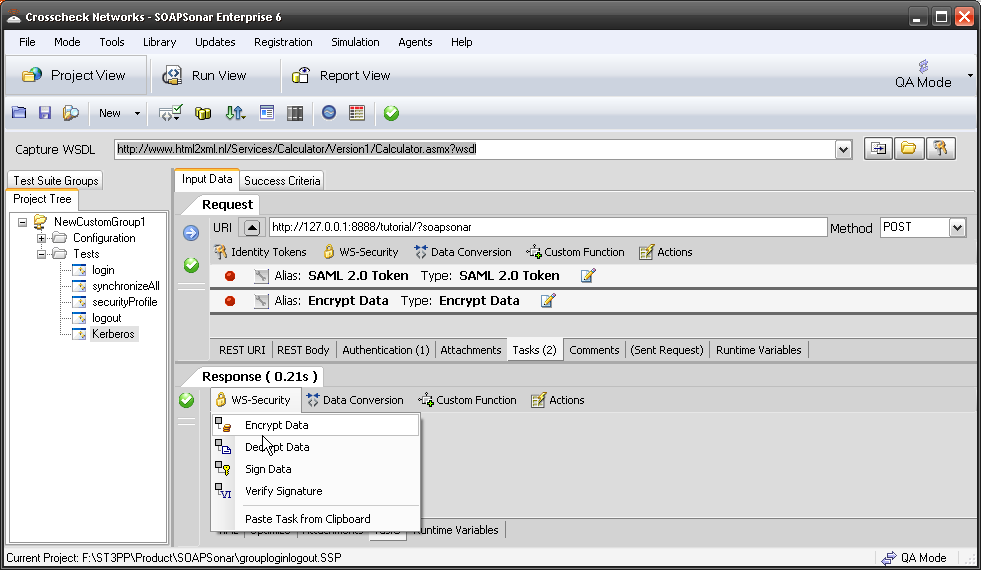
Sometimes identity needs to be in the header. In the request section of SOAPSonar, at the bottom is a number of tabs.  By either clicking on the keys icon or the Authentication tab, can see a number of options for configuration. Here you can find Basic, Kerberos, or Digest Authentication settings. You can also set up using the returned cookies and SSL certificates to send embed as part of the header message. (a reminder at the bottom says For WSS-Token SOAP Header Authentication, use the Tasks tab). In the screen below, I selected Basic and entered my username and password.
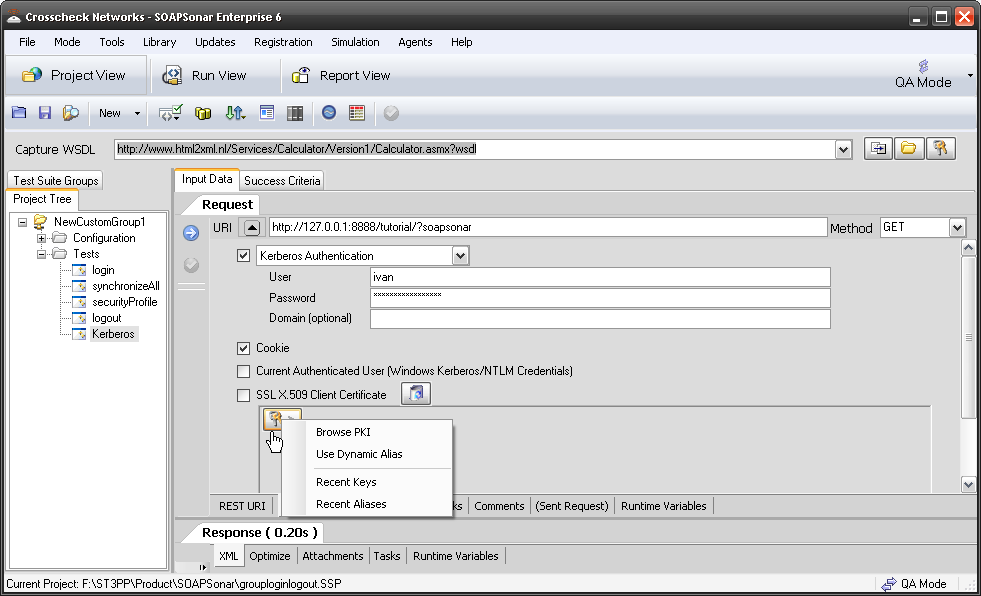
2 Encryption

When I look at the message header request I sent, I can see the line Authorization: Basic aXZhbjpteXNlY3JldCBwYXNzd29yZA== added to the header request sent.

3 Request

In the Task tab, is a number of Token and WS-Security Functions. Looking first at Identity Tokens, you can select from a wide variety supported.

4. Tasks

I selected SAML 2.0 Token, popular with today’s mobile applications. Once added, you can configure the token by selecting the spanner icon next to it and activate it by ensuring it shows a green dot.  Here is a screenshot of just the first tab for SAML token configuration. As you can see the options need to be extensive.

5. Options

A second group of tasks is the WS-Security tasks. Here you can encrypt and decrypt the message with various keys and options. This enables testing of HTTPS and other secure services using the same test cases developed for functional testing.

6. Token

Once added, you again configure it by selecting the spanner icon and activate/deactivate it by enabling a green dot.

7 PKI

The same WS-Security settings are available in the response section, to encrypt or decrypt the response.

8 response

Conclusion

Integrating identity, authorization and encryption into your automation test case is essential if you wish to do any kind of continual testing or regression testing. Especially using your test cases after release, were without these features, your test cases developed would be not work in a production environment.

This tutorial did not show a real examples, but I wanted to highlight were to go and what are some of the options for testing authentication, identity and encryption, without blacking out my secret keys, to look like some 3 or 4 letter government censorship organization got to the pictures first. I hope you find it useful in getting started. Comments?

7. SOAPSonar – Baseline and Regression Testing

We all have had experiences were “someone” decided to make a slight “tweak” to some code then promptly forgot to mention it to anyone else or at least the right someone else. That slight tweak causing some change, be it expected or not, that causes other parties to spend hours trying to trace the cause.

One of the key benefits of automation is the ability to identify any changes to XML by doing a XML diff. Comparing one version (Baseline) to that of another, (Regression Test). With web services API, we interested in the Request and Responses to ensure that they are not different, or rather that only expected differences are there. We need the flexibility to ensure that a some of the parameters be ignored, when they expected to be different each time.  Take for instance a file reference number or a service that returns the time. We may want to check to make sure the fields for Hour, Minute, Day, Month, Year etc remain unchanged, but perhaps we wish to accept changes to values in the fields, or limit these to certain parameters. Establishing what to check against the baseline and what not to, is an important part of regression testing.

Here is a Very Simple Baseline and regression test, using the SOAP Calculate Service.

1. Run SOAPSonar (with Admin Rights). Paste

http://www.html2xml.nl/Services/Calculator/Version1/Calculator.asmx?wsdl

into the Capture WSDL bar. Select Capture WSDL.

2. Lets use the Add Service. Select Add_1 and enter a=3 and b=3. Commit, Send. Hopefully your response was 6. If not, perhaps I could suggest some services? Rename it baseline.

2 Project View

3. Now lets select Run View, Drag Baseline into the DefaultGroup. Now select the Icon Generate New Regression Baseline Response Set.

3 Generate

4. Select XML Diff of Entire Baseline Response Document. This option matches both nodes and values.. Select OK, (Commit and Send if you need to)

4 XML diff

5. After the test is run, you will see the Test Suite Regression Baseline Editor. This is were you can select what you wish to watch or ignore. Automatically a base rule is generated. If you select Index 1, you should have 1 rule XPath Match. If you select XPath Match, you should see all the nodes graphically laid out for you. At the bottom you have 3 tabs. Baseline Criteria, Baseline Request (Captured Request), Baseline Response (Captured Response). For now, lets not change anything and just select OK.
5 Baseline editor

6. Lets go back to Project View, and change our b= to 9. The response should now be 12. Commit and send to Check. Then select Run View and change the Success Criteria to Regression Baseline Rules (See cursor). Commit and Send. This time, did your Success Criteria Evaluation Fail? It should, as it was expecting 6 as a response and not 12. Analyse Results in Report View.

6. Run baseline

7. If you now select that failed test case and then select the tab Success Criteria Evaluation, you see that Regression Baseline XML Node and Value Match failed, and it was the AddResult value.

7. Failed

8. Select Generate Report, then [HTML] Baseline Regression XML Diff Report and generate the report. Then View the report. Select Response Diff for Index 1. 1 Change found and you can clearly see it marked in Red.

8 report

9. Now lets ignore the response value, but maintain regression for the rest of the test case. Select Run View, then Edit Current Baseline Settings.

10 ignore

10. You should be back in the Test Suite Regression Baseline Editor. Select Index 1, then your rule and right click on AddResult in the visual tree. Select Exclude Fragment Array. It should show now in Red as excluded. Ok, Commit and Send. Your Regression Test should now pass, as everything but that value is still the same.

9 change

Conclusion

Automation of Regression Testing is far more than running an XML Diff. It involves selecting what aspects are expected to change and what aspects are not. By eliminating expected changes, any failures in future regression tests can receive the focus they deserve. Once automated, this can be run, hourly, daily, weekly or as needed, consuming little to know human interaction. Many of our customers, maintain a baseline and consistent regression test on 3rd party code. Any service their systems rely on, which they are not personally aware of development cycle. Continually testing through automated process to ensure they aware of any changes to the code.

Questions, Thoughts?