


8. SOAPSonar – Identity and Authorization
Many of our customers start their development or testing using some other product, then reach a point where they need to use some form of identification, cookie, key, encryption or other form of authorization and realize the tool they using does not support what they need. They then look at the months work completed vs starting with a new tool.
There are simply so many ways, standards and architectures for identity, that most tools are unable to support more than a few. Before selecting an automation tool, I highly recommend taking the time to identify and test all the applicable identity and authorization needs you may have. Although this is a “tutorial” I am not going to cover off all possible options, or full detail on a single option. Rather, I will try and explain some of the more common options and were to find these settings.
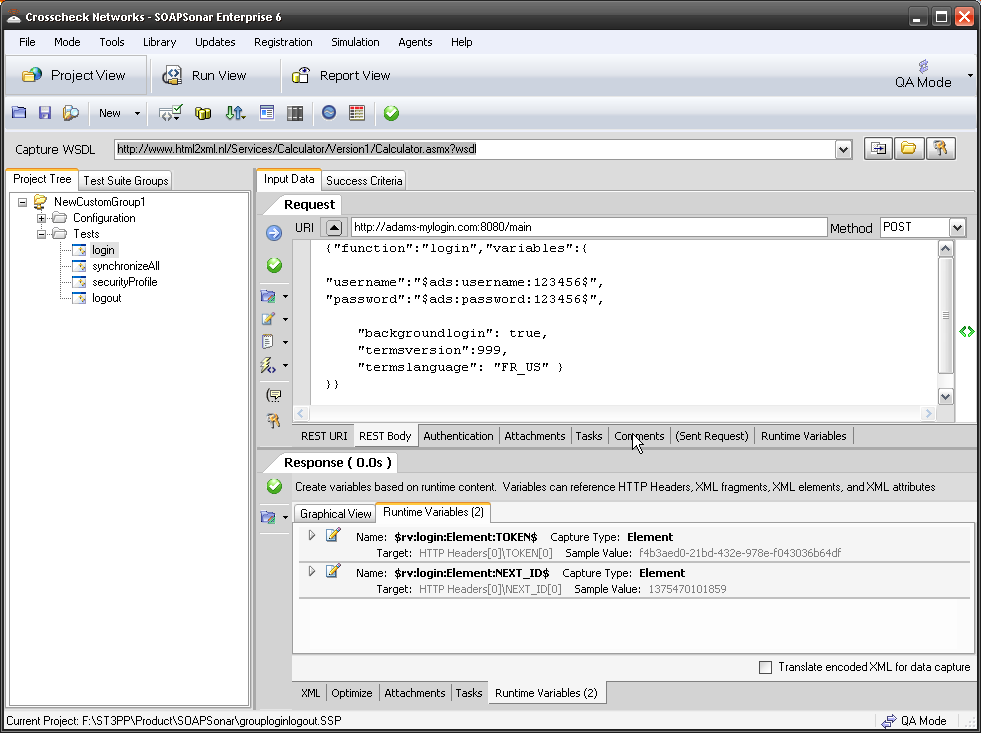
In this first example I want to show the testing of a login service. In this (REST) example a POST request is made to a given URI and the message body contains the username and password variables. Once successfully logged in, the service responds with a Token and ID, that are used further in the application. These username and password variables can be tested via an automation data source (.csv) and each step of the login process chained, by creating a runtime variable of the token response. The benefit is then the ability to load test this login service using this [ADS].
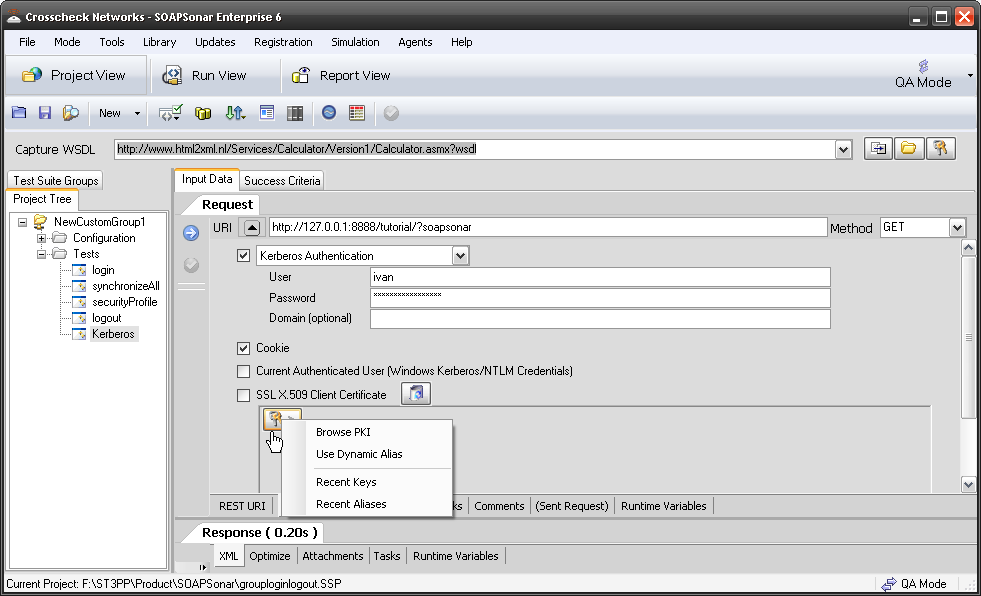
 Sometimes identity needs to be in the header. In the request section of SOAPSonar, at the bottom is a number of tabs. By either clicking on the keys icon or the Authentication tab, can see a number of options for configuration. Here you can find Basic, Kerberos, or Digest Authentication settings. You can also set up using the returned cookies and SSL certificates to send embed as part of the header message. (a reminder at the bottom says For WSS-Token SOAP Header Authentication, use the Tasks tab). In the screen below, I selected Basic and entered my username and password.
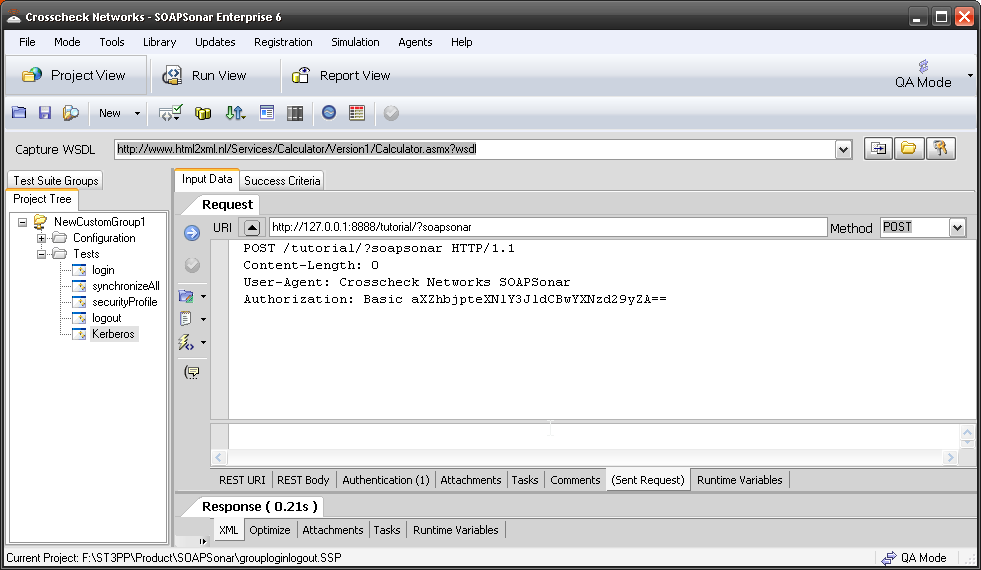
When I look at the message header request I sent, I can see the line Authorization: Basic aXZhbjpteXNlY3JldCBwYXNzd29yZA== added to the header request sent.
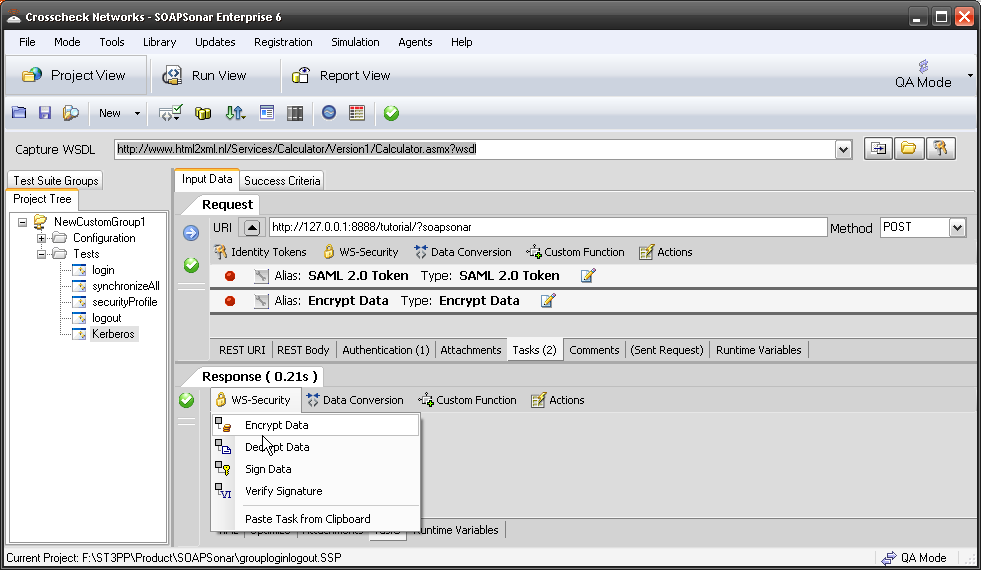
In the Task tab, is a number of Token and WS-Security Functions. Looking first at Identity Tokens, you can select from a wide variety supported.
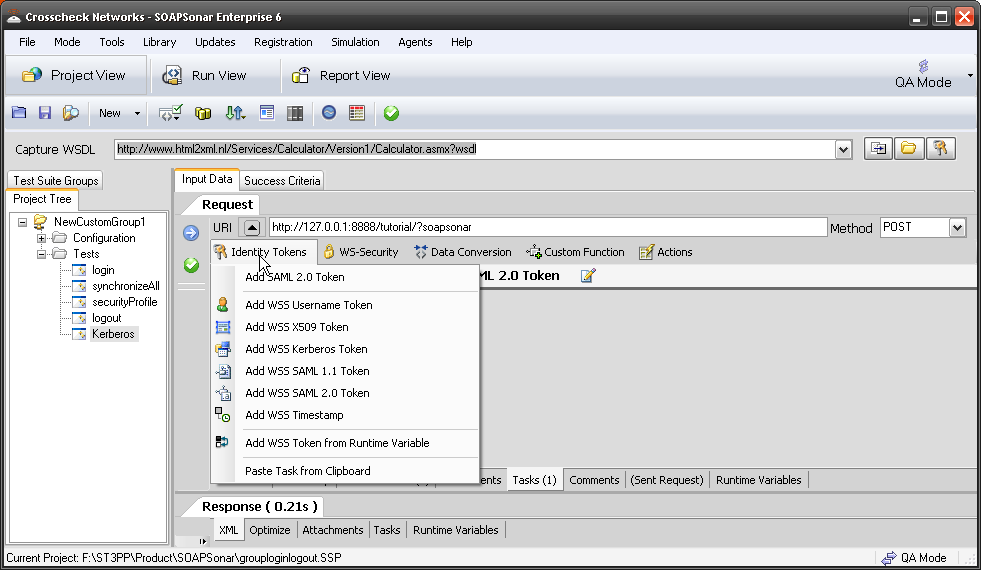
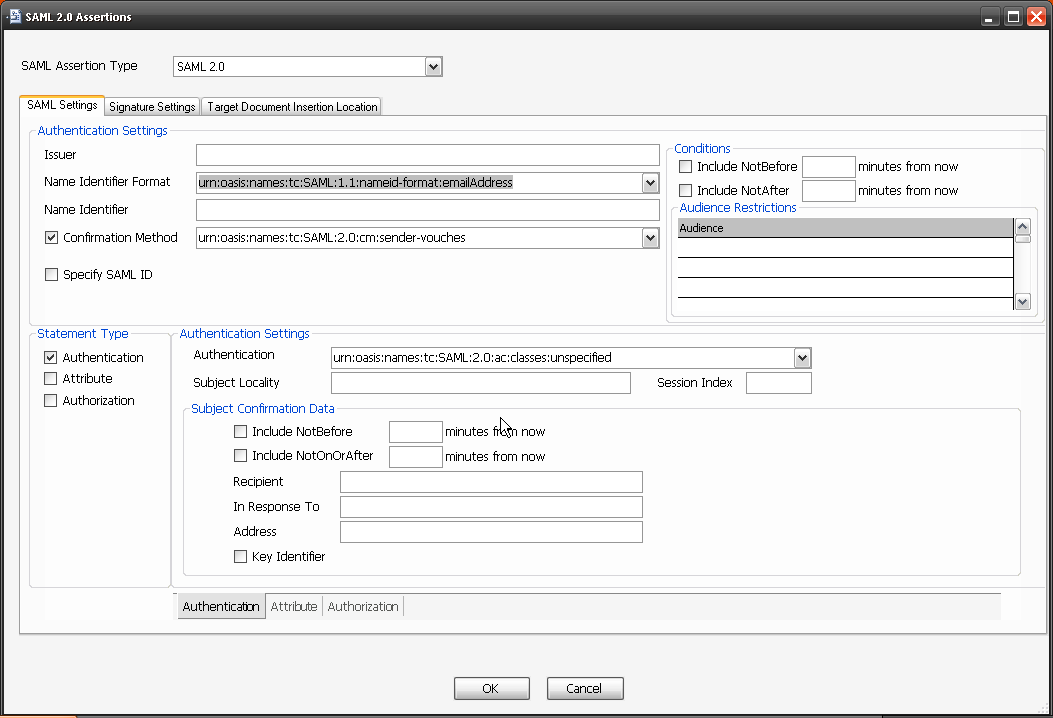
I selected SAML 2.0 Token, popular with today’s mobile applications. Once added, you can configure the token by selecting the spanner icon next to it and activate it by ensuring it shows a green dot. Here is a screenshot of just the first tab for SAML token configuration. As you can see the options need to be extensive.
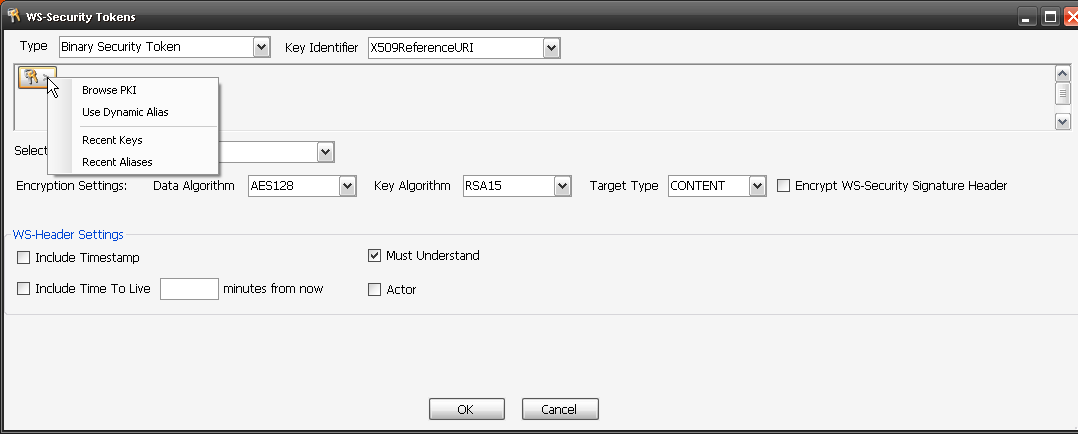
A second group of tasks is the WS-Security tasks. Here you can encrypt and decrypt the message with various keys and options. This enables testing of HTTPS and other secure services using the same test cases developed for functional testing.
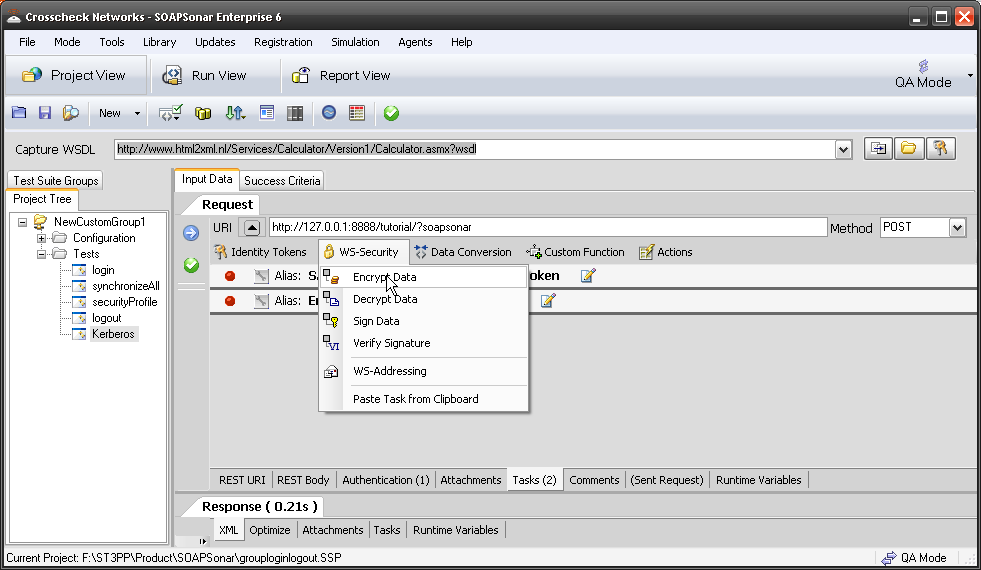
Once added, you again configure it by selecting the spanner icon and activate/deactivate it by enabling a green dot.
The same WS-Security settings are available in the response section, to encrypt or decrypt the response.
Conclusion
Integrating identity, authorization and encryption into your automation test case is essential if you wish to do any kind of continual testing or regression testing. Especially using your test cases after release, were without these features, your test cases developed would be not work in a production environment.
This tutorial did not show a real examples, but I wanted to highlight were to go and what are some of the options for testing authentication, identity and encryption, without blacking out my secret keys, to look like some 3 or 4 letter government censorship organization got to the pictures first. I hope you find it useful in getting started. Comments?